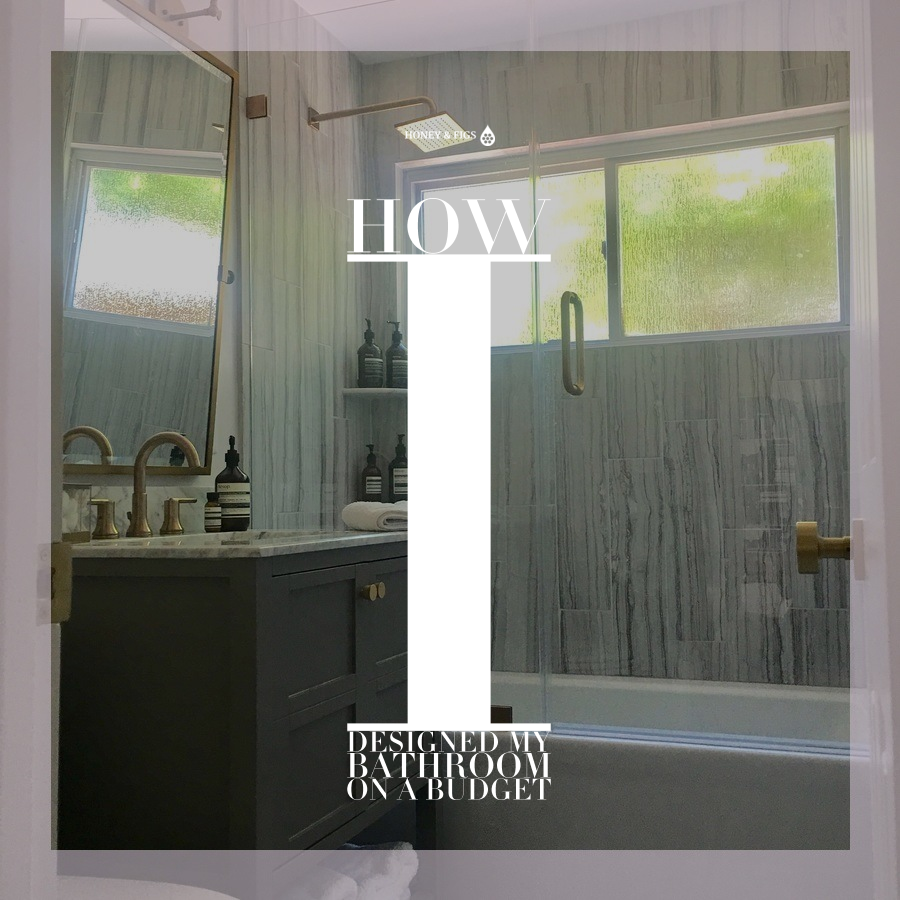
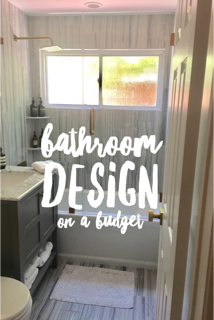
How I designed and remodeled our guest bathroom in 10 easy steps!
Step 1: Find Your Inspiration and color scheme
It took me 11 years to finally pull the trigger on our guest bathroom remodel but I finally did it. This is the finished product to the left.
The main reason I kept putting it off was that I did not have a bathroom design in mind. If you’re finally ready to get serious about that ugly bathroom you’ve been wanting to makeover for years, then step one is to find your inspiration and settle on the look you want.
I settled on the photo below from Erin Gates over at Elements of Style for my inspiration because I knew I wanted to have a grey and white bathroom with gold fixtures.
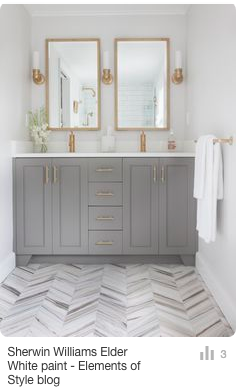
I let this photo serve as my north star and began searching for the elements to bring it to life. I started with the paint and found the same as in my inspo photo, Sherwin Williams Elder White and Benjamin Moore’s Decorator’s White for the trim.
Step 2: Set Your Budget and choose your contractor
I had been socking away money each month for “home repairs” and decided to use this bucket of cash to fund my dream bathroom. It was really helpful to start the project with an actual budget in mind because it gave me parameters to work within. Having a budget forces you to make decisions on what you really want versus what’s just “nice to have”. I quickly discovered that the costliest part of a bathroom remod is the labor, not the materials. Luckily someone at our church is a contractor and offered to do the work for us at 40% less than the quotes we received. I created a Bathroom Design Budget to keep track of the cost of all my materials and easily move the budget around based on what was important to me. Feel free to download and use it.
Step 3: Pick Your Tile
The reason I say to start with the tile is because it will serve as one of the main features that shapes the look of a small bathroom. In my case, I chose to use the same tile for the flooring as the bath/shower walls. I chose to run the tile vertically on the shower walls and continue the tile all the way to the ceiling. I kept the same vertical placement on the floor to bring continuity to the space. Tile was not something I was willing to splurge on so I found this composite from Home Depot that worked perfectly with my vision. Total cost was $266 for the entire materials including grout.

{Marazzi VitaElegante Porcelain Floor and Wall Tile}
Step 4: Pick Your Tub, Drain and Shower Doors
Choosing a tub can be difficult if you don’t know what you want. Start by measuring your tub space and then search for tubs that meet your measurements, your budget and your style aesthetic. In the case of my tub, I was going for a modern look so it was important to me that the tub had square lines. I ordered this Kohler tub online at Lowes and had it shipped to the store for my contractor to pick up. Upon investigation the tub I actually received was not the Kohler Archer I ordered, but rather the Kohler Underscore with an inclined back for lumbar support. I didn’t realize the error until it was too late so I just kept the tub and it not only looks great but is really great for those who love baths, which are my nightly ritual. You can find the same tub pictured below at Amazon.
Make sure to choose a tub drain as well and that it matches the finish of the faucets you choose.

{Kohler Archer Bathtub white with Bronze Drain}
The next decision I faced with the tub was whether or not to build a shelf into the wall for shampoo, etc. It turned out that our wall was not deep enough to create the shelf needed so I had to switch to plan B and purchased these marble corner shelves instead.

Lastly, decide whether you prefer to have a shower curtain or shower doors solution. Glass shower doors with gold hardware were something I knew I wanted and I was willing to splurge here to save elsewhere. I found these at a local shower door outlet for $1,000 installed.

Step 5: Choose Your Fixtures

This includes shower head, tub and sink faucets. Pay close attention to the color you choose for the faucets because it may be difficult to find a match for the tub drain, especially if you mix and match brands. For example, I chose this Delta shower/tub faucet and this sink faucet in Champagne Bronze, but I chose a Kohler tub.

The Kohler drain finish I purchased was bright brass at first. I had to exchange the tub drain for the bronze instead which ended up working perfectly but I could have saved myself the stress if I had paid closer attention to the finishes in the beginning.
Step 6: Choose Your Vanity
Next, begin to search for a vanity that best resembles your inspirational photo. I searched for grey vanities with marble tops and easily found a variety of options. I ultimately settled on this one from Wayfair.

Step 7: Measure the Mirror space
I neglected to take into account the measurements of the space for the mirror above the vanity and this almost sabotaged my entire design because there was barely enough room for the outlet once we installed the mirror. Measure the space from the ceiling to the floor and subtract the height of the vanity to get the maximum space to work with. Subtract at least 6 inches from the ceiling to allow for the lighting fixtures and another 6 inches for the fixtures to the bottom of the mirror. I found this Pottery Barn mirror on sale. Then make sure to account for the outlet space.

{Pottery Barn Kensington Pivot Mirror in Brushed Bronze // Permo Vintage Industrial Sconces}
Step 8: Choose the lighting
It’s important when choosing lighting in the bathroom to not choose lighting with shades that will cast shadows on your face. I chose globe sconces with Edison bulbs but installed them pointing upward instead of pointing down to better distribute the light. I found these lights on Amazon for $50 each. Best score ever.
Step 9: Choose the Toilet & Baseboards
First measure the toilet to get a sense of the space you have to work with. Our bathroom is so small that having an elongated toilet was not an option because the door would end up hitting the toilet and be unable to close. When choosing your new toilet, also keep in mind the other elements of your space. Are they square or rounded? Are they simple or ornate? Then choose a toilet that follows the same model. I never understood why toilets always had the curved coil porcelain at the base, it’s so hard to clean all those curves! I found a toilet that had a straight base and I was so happy with it. I wanted simple easy to clean so I went with this American Standard Cadet from Home Depot. I chose a simple 3 ¼ inch baseboard from Home Depot that was easy to clean.

{American Standard Cadet 3 Round Toilet}
Step 10: Choose accessories
When it comes to designing a space, the details matter. Keep in mind things like ease of use and practicality when creating your design. I found myself googling questions like “standard height for toilet paper holder”, which by the way is 26” above the floor. We always seem to have mass amounts of magazines around so a magazine rack for the bathroom was an important feature to me. I knew I wanted a rectangle design that hung on the wall and I found this great one at CB2 which I spray painted gold to match the rest of the fixtures.

{CB2 Hanging Magazine Rack}
I knew I wanted to protect my freshly painted walls from being slammed against by the doorknob so a gold magnetic doorstopper was a great solution. Best $9 ever spent.

{Gold Magnetic Door Stopper}
Since I opted for glass shower doors I did not want the possibility of hitting the door against anything when it fully opened so I opted for a towel hook on the back of the door instead of a towel rack.

{Gold Towel/Robe Hook}
I also preferred to have a hand towel on the corner of the vanity instead of hanging from a wall. I did want to hang something above the toilet so I found this basket on sale at Target for $3 and spray painted it gold. Similar here. I used it for my favorite accessory- Spring’s Eden reed diffuser in amber bergamot, which makes the bathroom smell fantastic.

{Threshold Gold Diffuser Basket}
Last of all, the Doorknob was a detail I didn’t want to overlook. I found this gold one from Emtek.

{Emtek Doorknob in Gold}
I hope this post was helpful for you. Happy designing!
XO
Lisa
Comments 2
Merely a smiling visitor here to share the adore , btw outstanding style. Audacity, more audacity and always audacity. by Georges Jacques Danton.
Author
Thank you. So glad you stopped by!